Introduction
This guide will take you through the process of mapping Supporting Documents in your finova CRM and linking these to the finova Client Portal for client upload
| Widget Connector | ||||||||||
|---|---|---|---|---|---|---|---|---|---|---|
|
Location
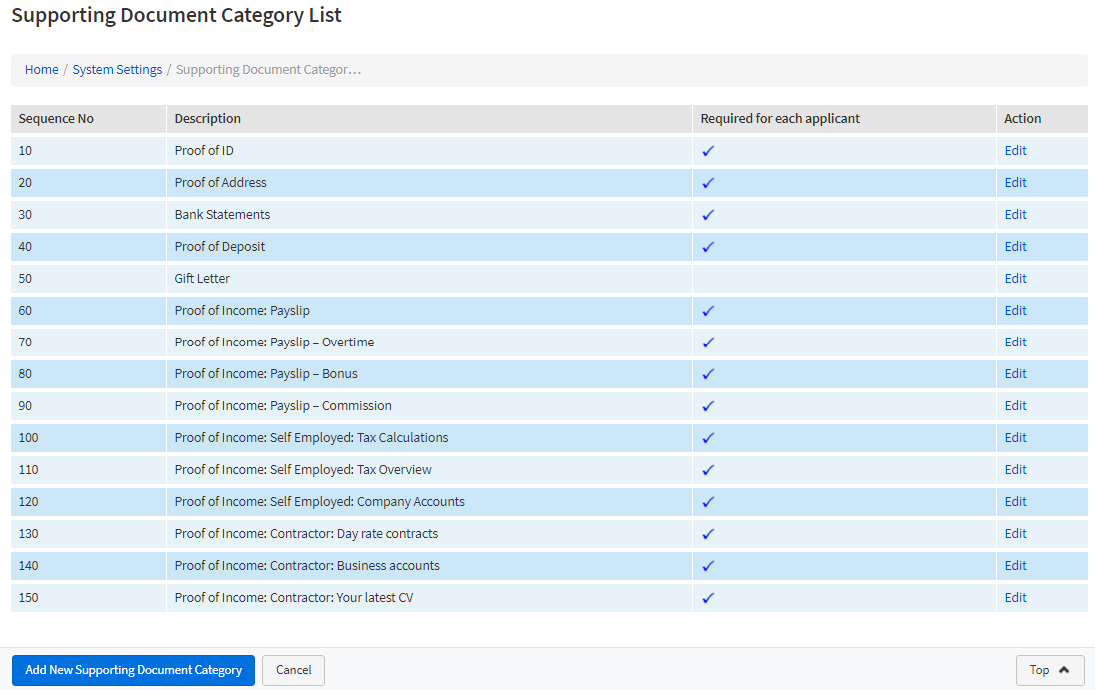
Navigate to the following screen:
Home / System Settings / Supporting Document Categories
A list of documents you require from you Clients will display. Here you can add new ones and edit existing
How to map a category
Example: Proof of ID
Use the ‘Edit’ option to amend the existing entry

Select the correct mapping option
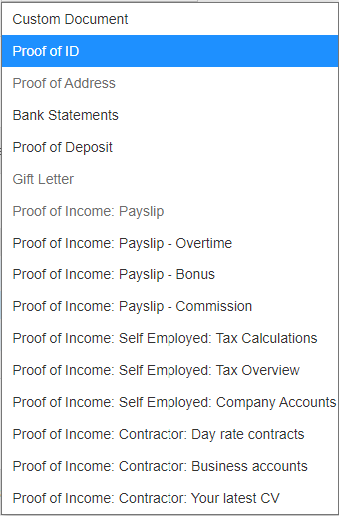
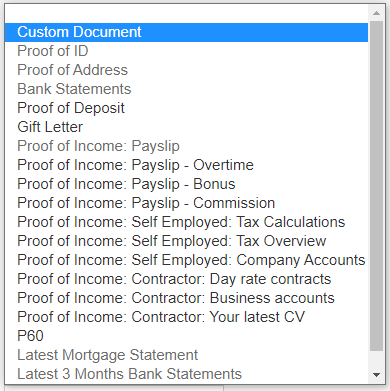
Use the finova Client Portal mapping dropdown to generate a list of the options available
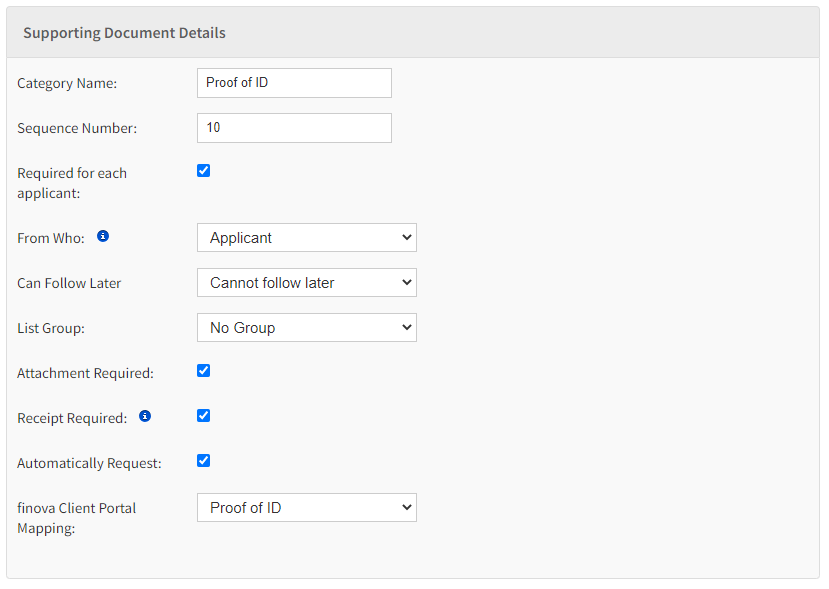
Choose from the list supplied
In this example, we are going to select the option ‘Proof of ID’
NOTE:
If the drop-down option is greyed-out, then this has already been mapped.
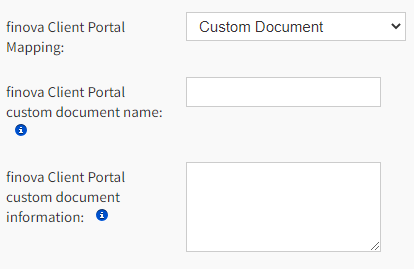
Should the finova Client Portal mapping not contain the document you wish to add choose ‘Custom Document’
Enter the finova Client Portal custom document name - this will be what your client sees on the Portal
Add the finova Client Portal custom document information for the client to know what documents you may accept and any further information that is relevant