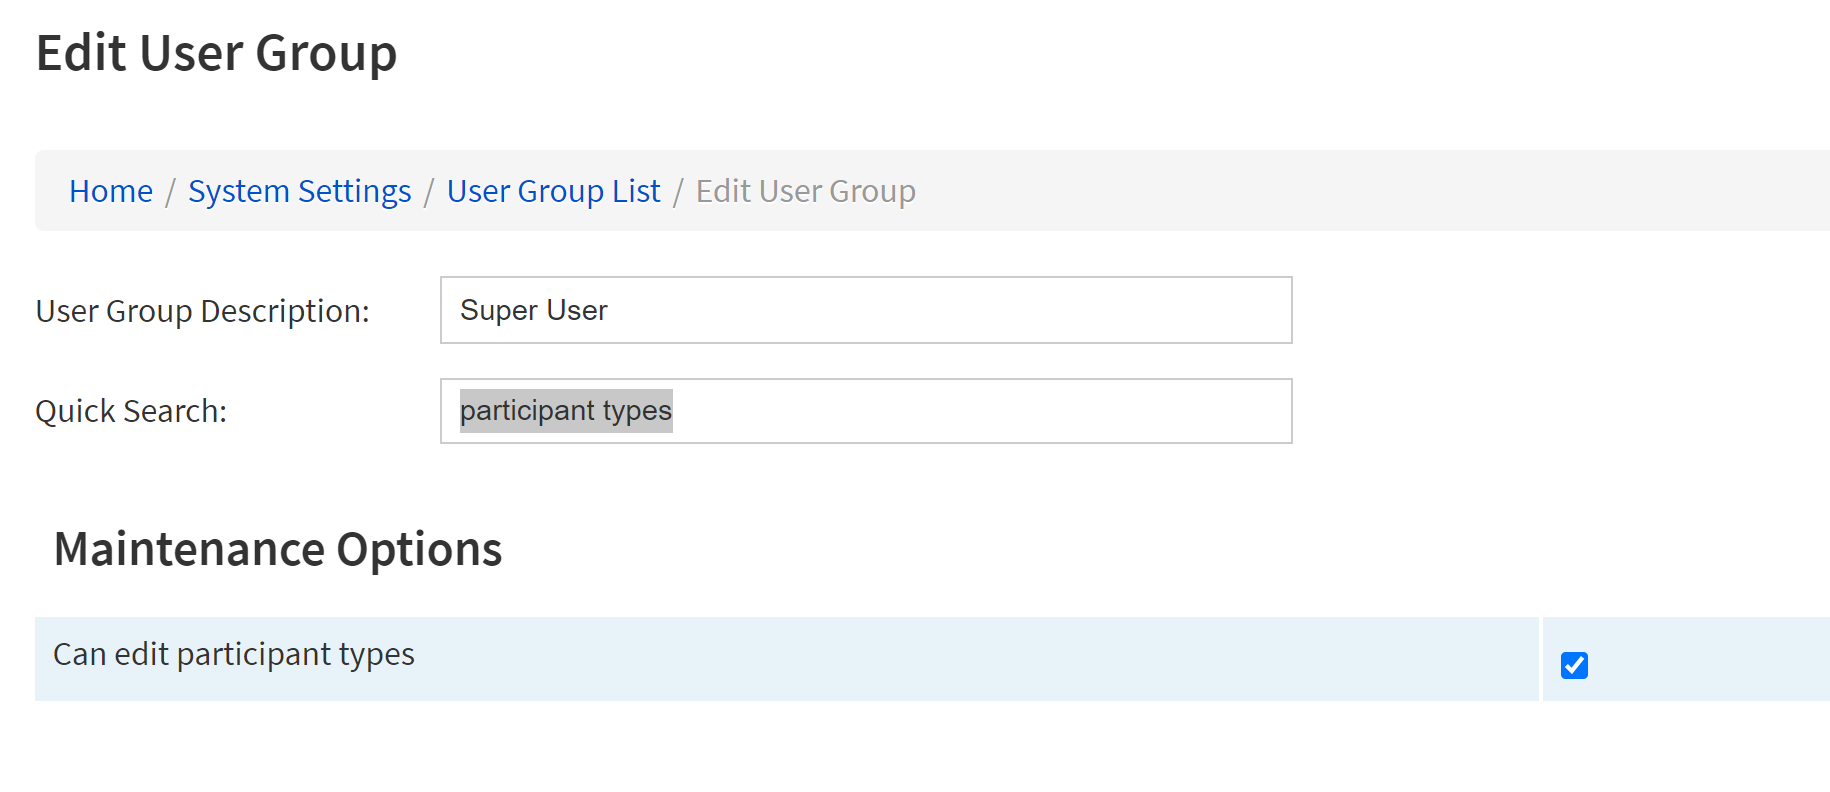
User Permissions
Home > System Settings > User Permission Groups & Set Permissions > Edit (against the user group you wish to update).
The specific user permission needs to be enabled to allow users to edit the ‘participant types'

What is a participant?
Participants are third parties who are involved in your case, they can be both internal and external entities, who are participating in a commission payment. For example:
Internal:
The business writer (adviser)
The company (your firm)
External:
An introducers (estate agency)
The network (AR firms)
What are commission amounts?
eKeeper handles commissions on incoming and outgoing perspectives.
What are Incoming commissions:
These are fees that you earn on your products e.g. proc fee, broker fee etc.
What are Outgoing commissions:
An outgoing commission value is calculated as a portion of the full incoming commission amount. These amounts are paid to introducers, advisers etc.
How are commission amounts calculated?
Outgoing commission amounts are associated with participants, so in order to pay an individual, they must be added to the product in question as a participant.
Adding a participant to a product
This section explains how to add a participant to your cases both as an existing, pre-configured, participant as well as a brand new participant which is configured for commissions whilst adding them to your products.
Adding an existing participant to a product
To begin open your product and find the participants panel (figure 1).
 Figure 1 - Participants Panel on a product
Participant Panel
The participants panel contains a list of the currently associated participants for the product you are currently viewing.
To add a participant to your product click the Add Participant link (figure 2)
| Info |
|---|
Below is a description of the columns of information that are displayed against each participant:
|

Figure 2 - Add Participant link
You will now see the participant address book (right).
To continue adding an existing participant to your case, use the search box, Participant Filters or Page Navigation Buttons (figures 3, 4, and 5 respectively) to find the participant that you wish to attach to your product.

Figure 3 - Search box
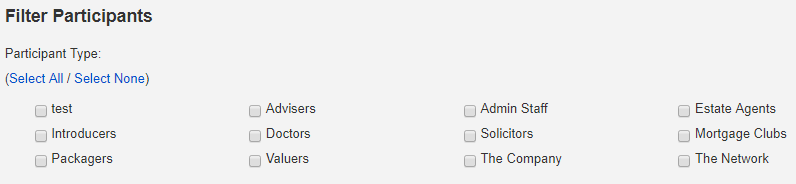
Figure 4 - Participant Filters

Figure 5 - Page Navigation buttons
Once you have found your desired participant click select next to the participant (figure 6) Figure 6 - Participant row (select button highlighted)
participant address book
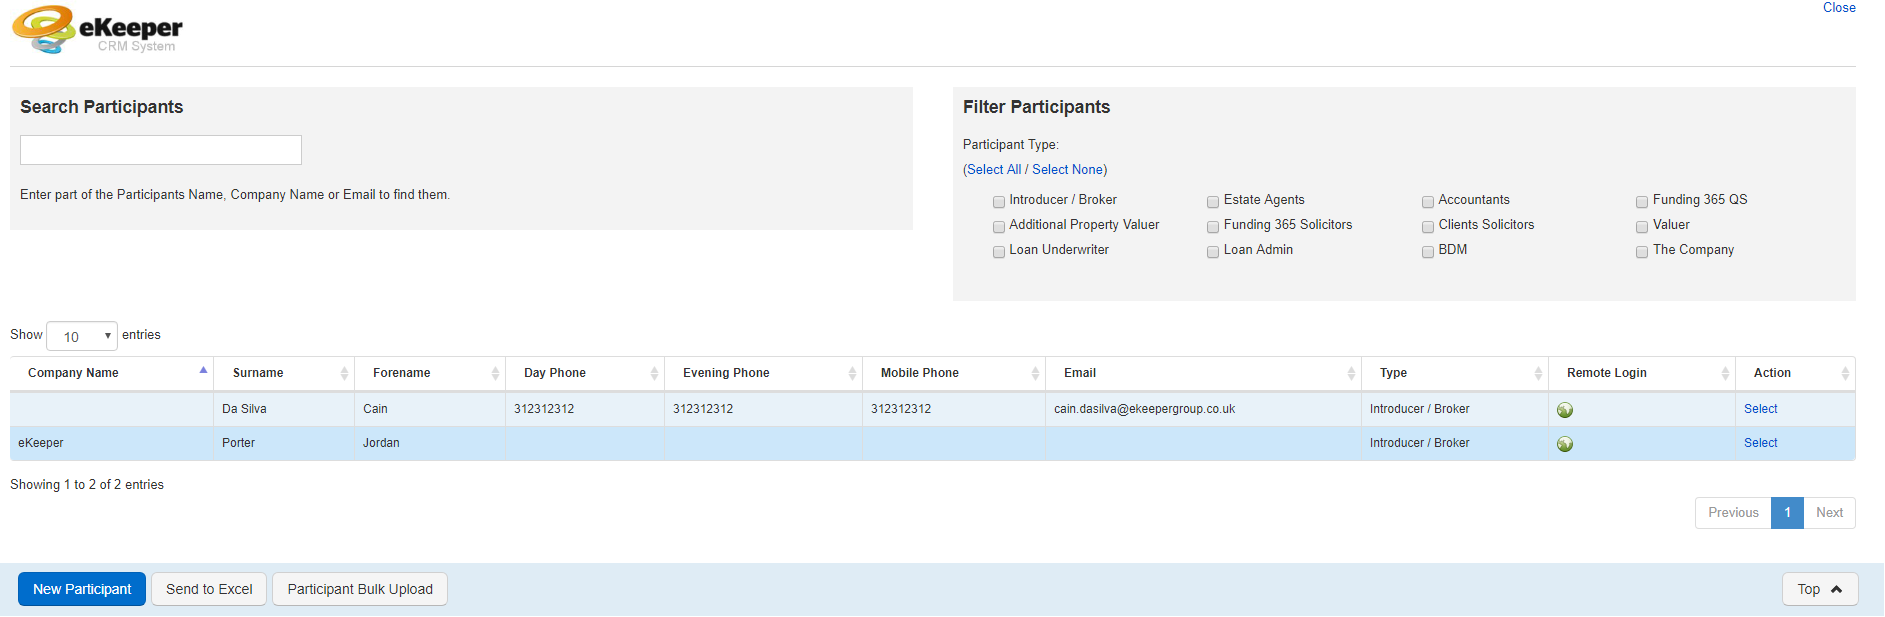
Participant Address Book
Adding a new participant to your product
To add a new participant to your product, first open the product and then finder your participants panel
| Info |
|---|
Below is a description of the columns of information that are displayed against each participant:
|
Figure 7 - Participants Panel
To add your new participant to your product click the add participant link in the top of the panel (figure 8)
Figure 8 - Add Participant link
You will now see the participant address book (right). Click the New Participant button located in the bottom navigation bar (figure 9) to continue.

Figure 9 - Bottom Navigation bar
Participant Address Book
Saving your participant
Once you have filled out all the panels where necessary click the Save and Close button, which appears in the bottom navigation bar
The participant you have created will now be available for all future cases. If you have set your participant to automatically add to your products then your participant will start to add for any new product you create from this point forward.

| Tip |
|---|
TipOnce you have clicked save and close you can still change the rules and details for a participant by heading to Homepage > Address book > participants and searching for your desired participant. |