Introduction
This guide will take you through the process of mapping finova CRM stages to the finova Client Portal Statuses
| Widget Connector | ||||||||||
|---|---|---|---|---|---|---|---|---|---|---|
|
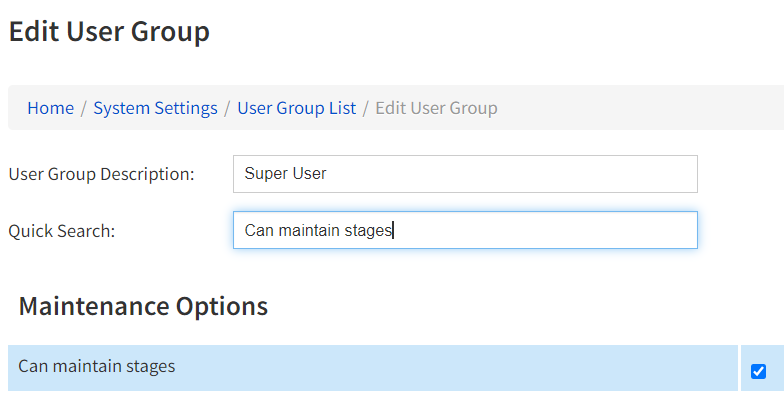
User Permission
Home > System Settings > User Permission Groups & Set Permissions > Edit (against the user group you wish to update).
The specific user permission needs to be enabled to allow users to edit the ‘Can Maintain Stages'
| Info |
|---|
IMFORMATION: You need to be a user with permissions to make system changes. If you do not see the above option, please see your system super user. |
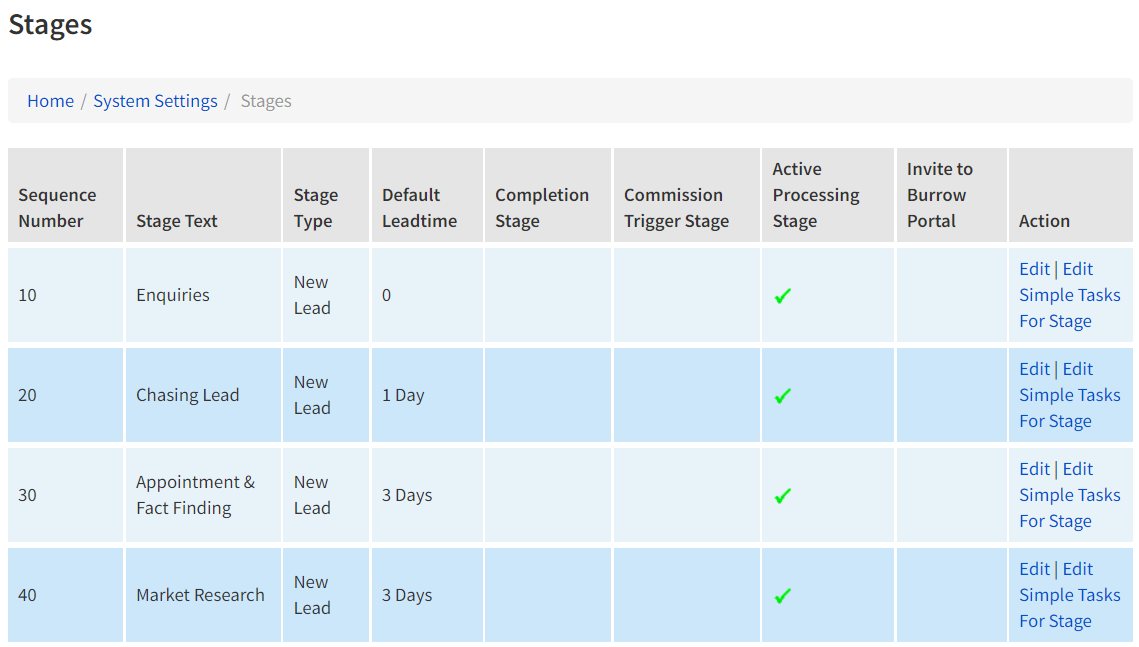
Location
Navigate to the following screen:
Home / System Settings / Stages
Choose the stage you wish to map with the finova Client Portal status.
NOTE:
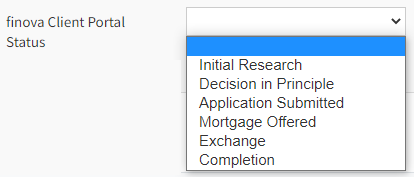
finova Client Portal Statuses that can be linked:
Initial Research
Decision in Principle
Application Submitted
Mortgage Offered
Exchange
Completion
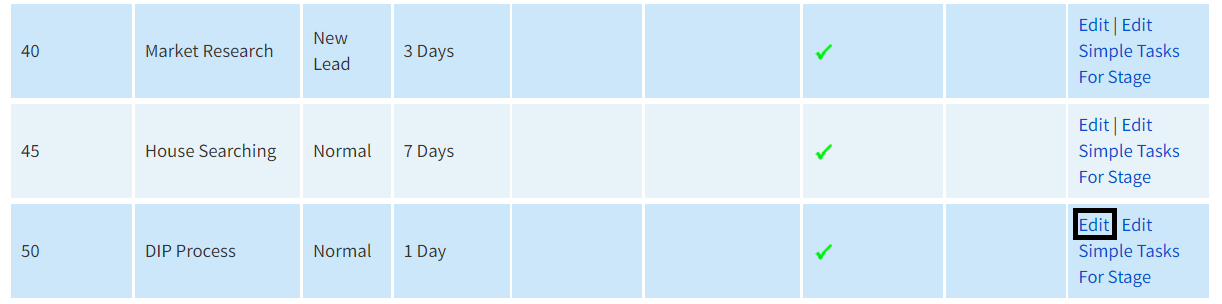
How to link a Stage to a Status
Use the ‘Edit’ action on the Stage you wish to link
Map the Stage
The Stage Details will allow you to make amendments to the Stage selected
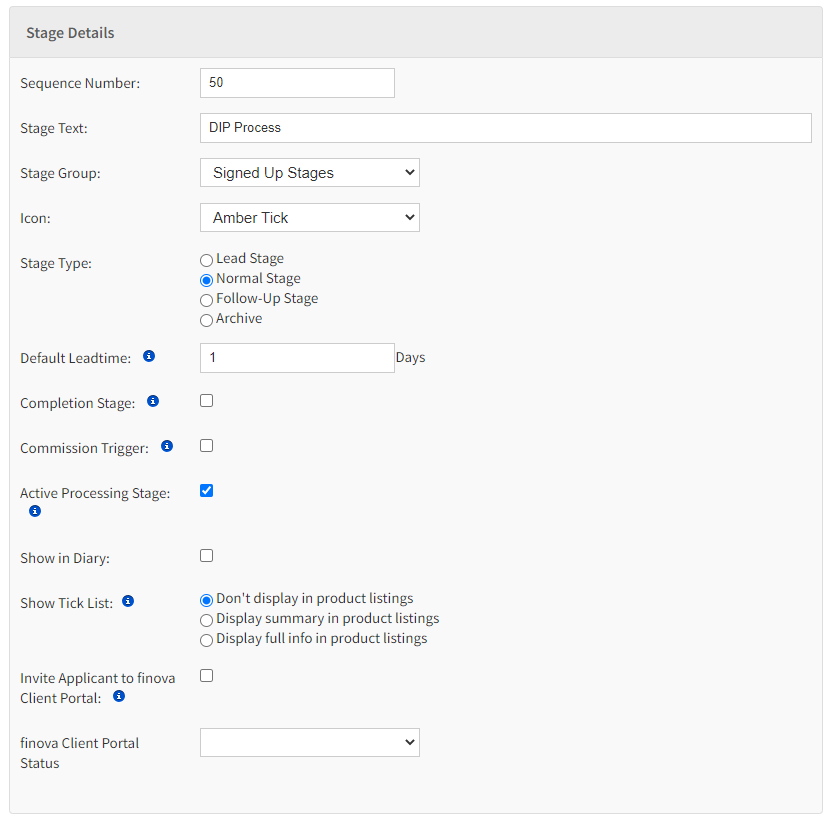
Locate the Status dropdown

Select the required Status
Next click the Save Stage button, located at the bottom of your screen.

| Tip |
|---|
SUCCESS: You have successfully mapped your finova Client Portal status |
NOTE:
Repeat this exercise for all of the finova CRM Stages where a Status links
| Info |
|---|
INORMATION: You can map the same finova Client Portal status to more than one finova CRM Stage |