...
| Note | ||
|---|---|---|
| ||
When Creating a prospect import file, the data in the CSV must mirror the format of the SENRO fields and drop down menus. An example of this is provided within the prospect import section. |
Accessing the Prospect Import Pageect Import Page;-
- Select 'Prospects' from the main navigation bar.
- Select 'Import Prospects' on the lower navigation bar.

Editing Import Filters;-
The import Filters allow you to select what information is brougth forward into SENRO from the Prospect CSV and also ammend the fields in which the data is stored within SENRO.

Validating the filters
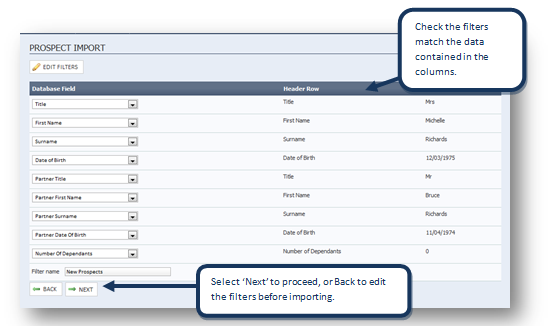
- Once you have Uploaded your prospect list with edited filters, or by using an existing template, the import file will be displayed with the header row (if applicable) and Row 1.
- This Screen enables you to double check the fields match the filters selected.
Validating New Imports - Stage 1
| Note | ||
|---|---|---|
| ||
This section only applies to 'New Prospect Imports'. Please refer to 'Validating Re-imports' for the next step for re-importing existing prospect records |
...
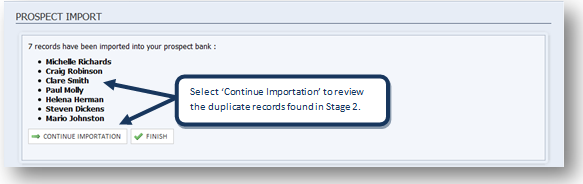
- Once you have imported the records from stage 1. the records imported will be displayed
Validating New imports - Stage 2
- Once you have completed stage 2, select 'Import Prospects'. SENRO will confirm the files imported, as displayed in stage 1.
...
| Note | ||
|---|---|---|
| ||
If a duplicate is found in the existing client bank, you cannot overwrite the client file |
Validating Re-Imports
- When re-importing prospect lists, you follow the same process to edit filters and upload your prospect file.
- Make sure your file contains the SENRO prospect ID, this can be obtained by Exporting your prospect list from Marketing before editing the file
- The export from marketing will contain the ID required to re-import the file. You will need to edit your filters to ensure your re-import template contains your Prospect ID
...