Participant Panel
The participants panel contains a list of the currently associated participants for the product you are currently viewing.

Figure 1 - Participants Panel on a product
To add a participant to your product click the Add Participant link (figure 2)

Figure 2 - Add Participant link
You will now see the participant address book (right). To continue adding an existing participant to your case, use the search box, Participant Filters or Page Navigation Buttons (figures 3, 4, and 5 respectively) to find the participant that you wish to attach to your product.

Figure 3 - Search box
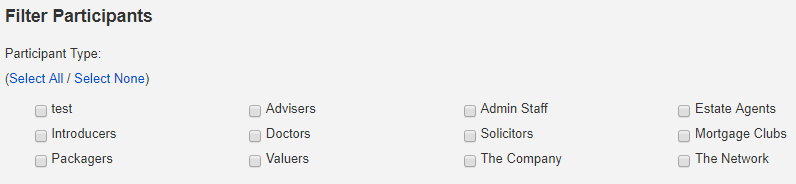
Figure 4 - Participant Filters

Figure 5 - Page Navigation buttons
Once you have found your desired participant click select next to the participant (figure 6) Figure 6 - Participant row (select button highlighted)
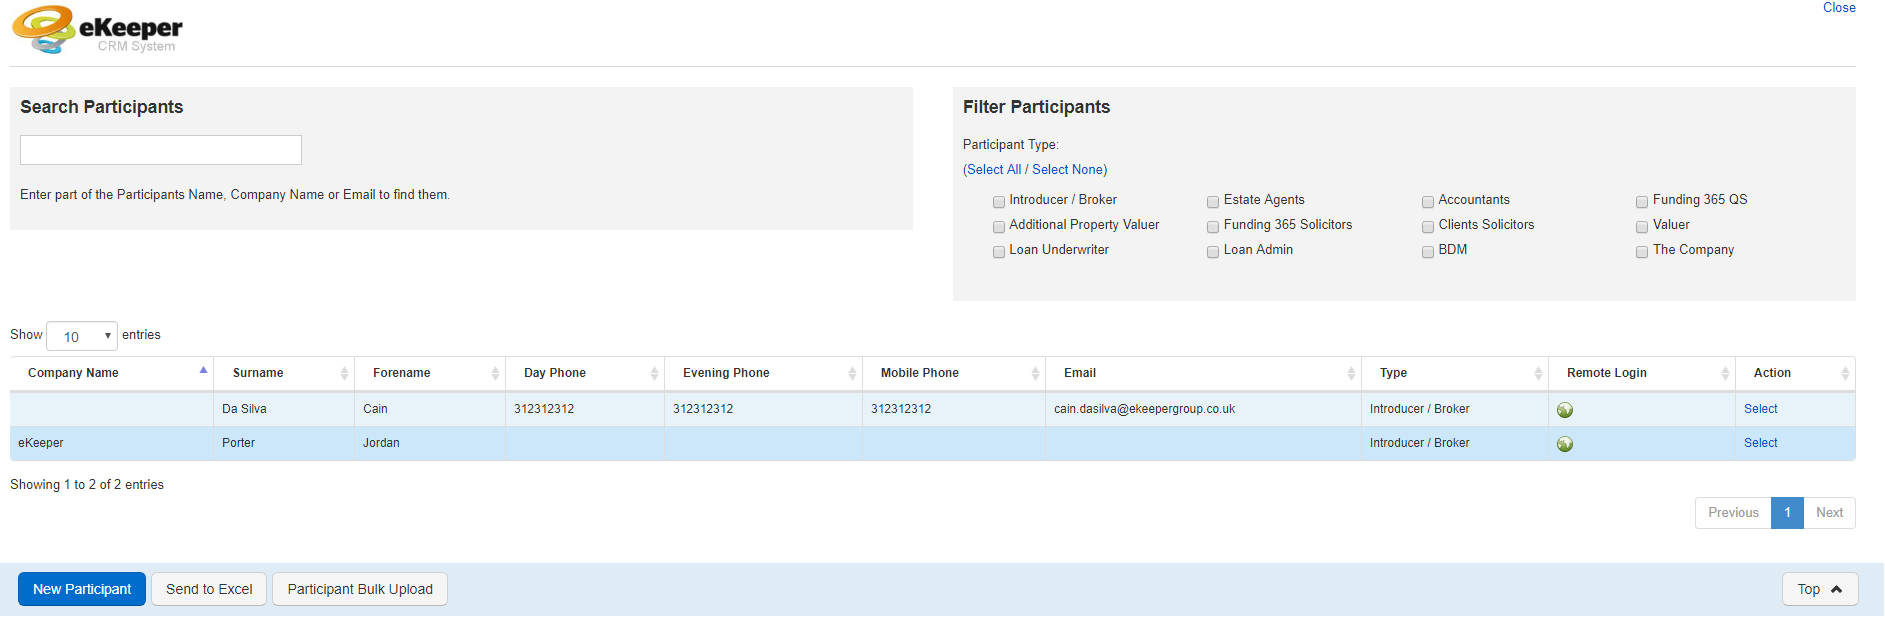
Participant Address Book
Adding a new participant to your product
To add a new participant to your product, first open the product and then finder your participants panel
Figure 7 - Participants Panel
To add your new participant to your product click the add participant link in the top of the panel (figure 8)
Figure 8 - Add Participant link
You will now see the participant address book (right). Click the New Participant button located in the bottom navigation bar (figure 9) to continue.

Figure 9 - Bottom Navigation bar
Participant Address Book
Configuring your new participant
You will now see the New Participant window (right). There are a number panels on this page, these will explained in turn below:
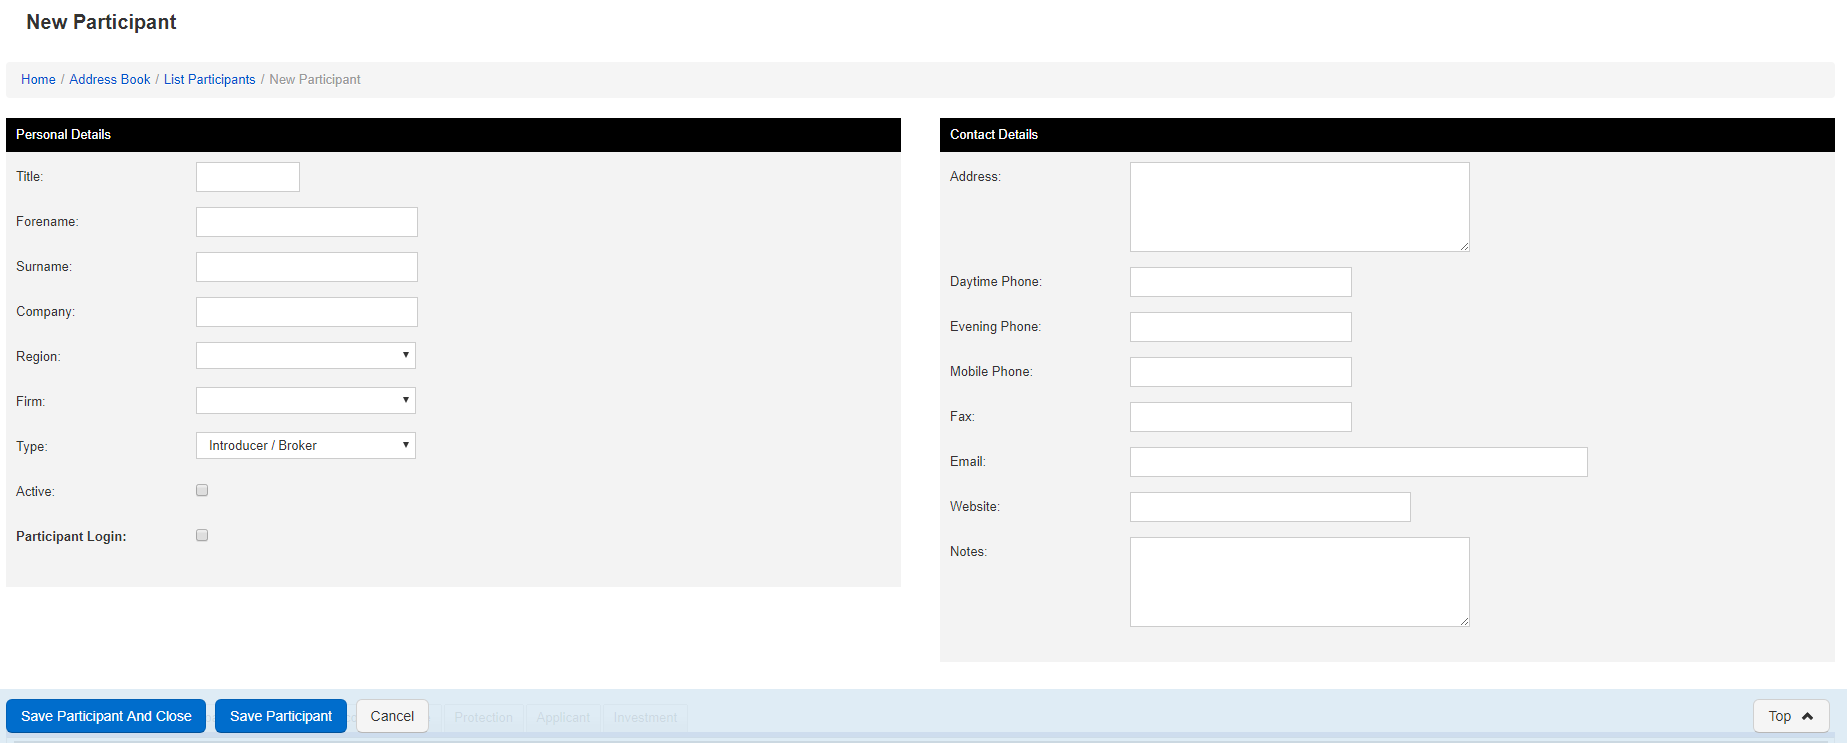
New Participant window
Personal Details Panel
The personal details panel provides fields for
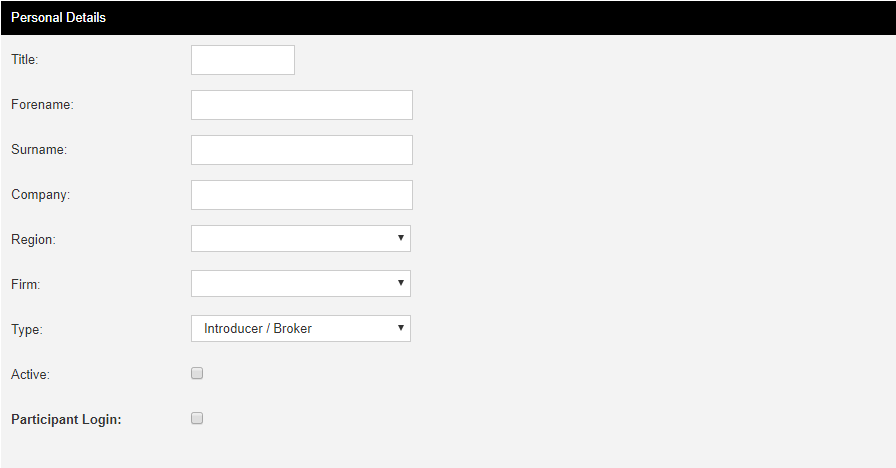
Figure 10 - Personal Details Panel
Contact Details Panel
The contact details panel enables you to add in your new participants contact details.
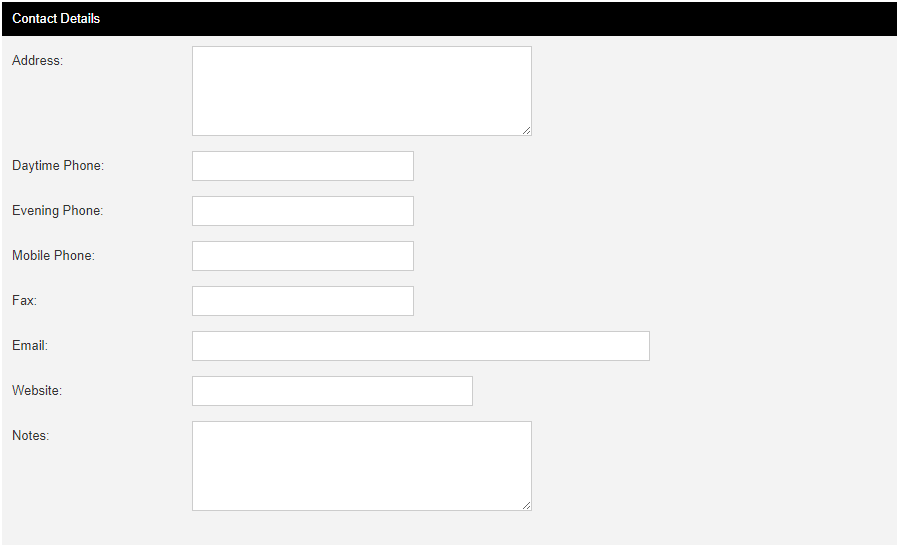
Figure 11 - Contact Details panel
The details entered into the Contact details panel will later be available via the products that your new participant is added to. All that you need to do is hover over the blue i-con.

Participant Commissions Panel
The participant commissions panel is where you can setup rules for how a participant is paid against particular fees in your cases.
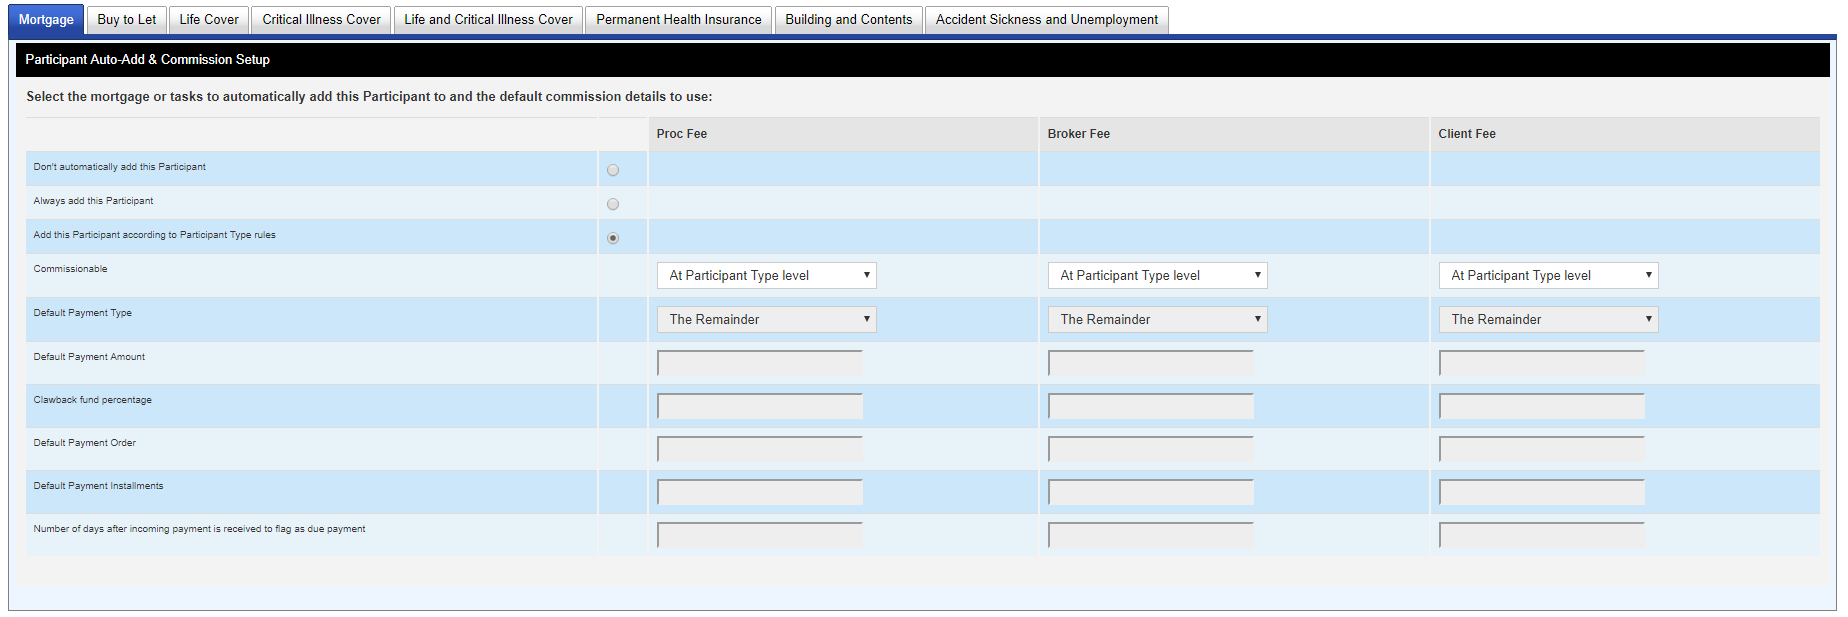 Figure 12 - Participant Commissions Panel
Product tabs
The Product tabs (figure 12a) across the top of the panel represent the different products that are currently setup in your system. Each Product will have a number of associated fees and so you will need to apply rules against each product type and against each fee.

Figure 12a - Product Tabs
Participant Commission Rules
Participant rules (figure 12b) are the row headings for each rule that can be applied to a fee.
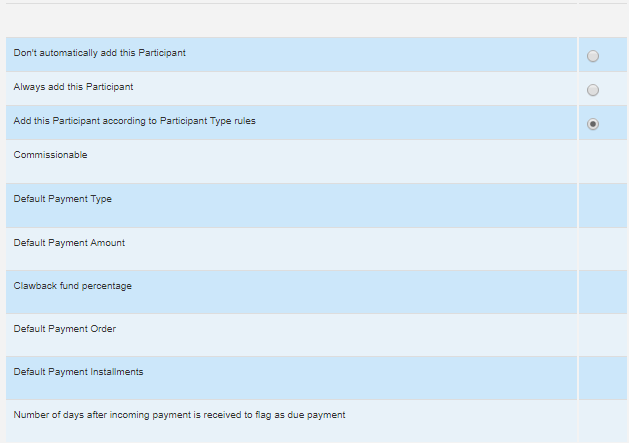
Figure 12b - Participant commission Rules.
Fee columns
The fee columns (figure 12c) represent each of the fees for the currently selected product. If you enter rule values into the fields, then the rules will apply to the fee labelled at the top of the column. For example in figure 12c below we can see that this is the Proc fee, so all the rules we enter here will apply to the proc fee amount on a particular product.
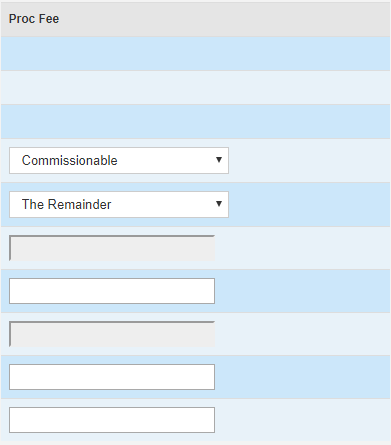
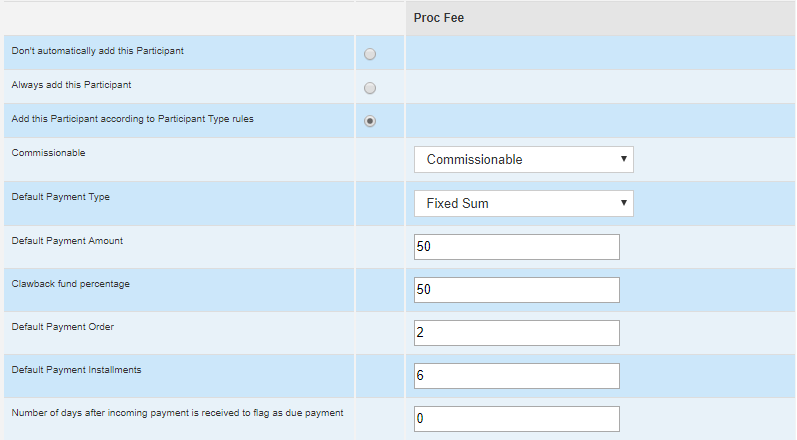
Figure 12c - Fee column (proc fee)
Example participant rules
This section provides some example rule sets for the commission rules setup against your participants
Participant paid a percentage on the gross fee
Scenario:
- The participant should manually be added to products as they are an introducer and do not introduce all our products.
- The Introducer should be commissionable as they normally receive 10% of the gross proc fee.
- The participant should be due their fee 15 days after the fee has been received.
Rules to setup in this scenario:

Participant paid a fixed amount on the net fee
Scenario:
- The participant is an adviser who takes a £50 fixed amount from the net proc fee.
- The Adviser should be added to products based on the type of participants (adviser)
- The adviser should be due their payment immediately after the incoming fee has been received.
- Their payment should be delivered over a 6 month period
- The adviser's payment should be deducted 50% to product against the product clawing back.
Rules to setup in this scenario:
Saving your participant
Once you have filled out all the panels where neccessary click the Save and Close button, which appears in the bottom navigation bar

Figure 13 - bottom navigation bar
The participant you have created will now be available for all future cases. If you have set your participant to automatically add to your products then your participant will start to add for any new product you create from this point forward.
Tip
Once you have clicked save and close you can still change the rules and details for a participant by heading to Homepage > Address book > participants and searching for your desired participant.