Product Panel Layout
Contents
Introduction
This guide will show you how to customise your Product Panel layout.
When you add a product to a case, the application details of that product are divided into easy-to-read panels.
For example you may wish for the Action History panel to be displayed more prominently at the top of the page, or perhaps you want to hide the Commission Details panel. eKeeper CRM allows you to achieve this, very easily.
-Product Panel Layout
Step 1 - How to find the Product Panel Setup page
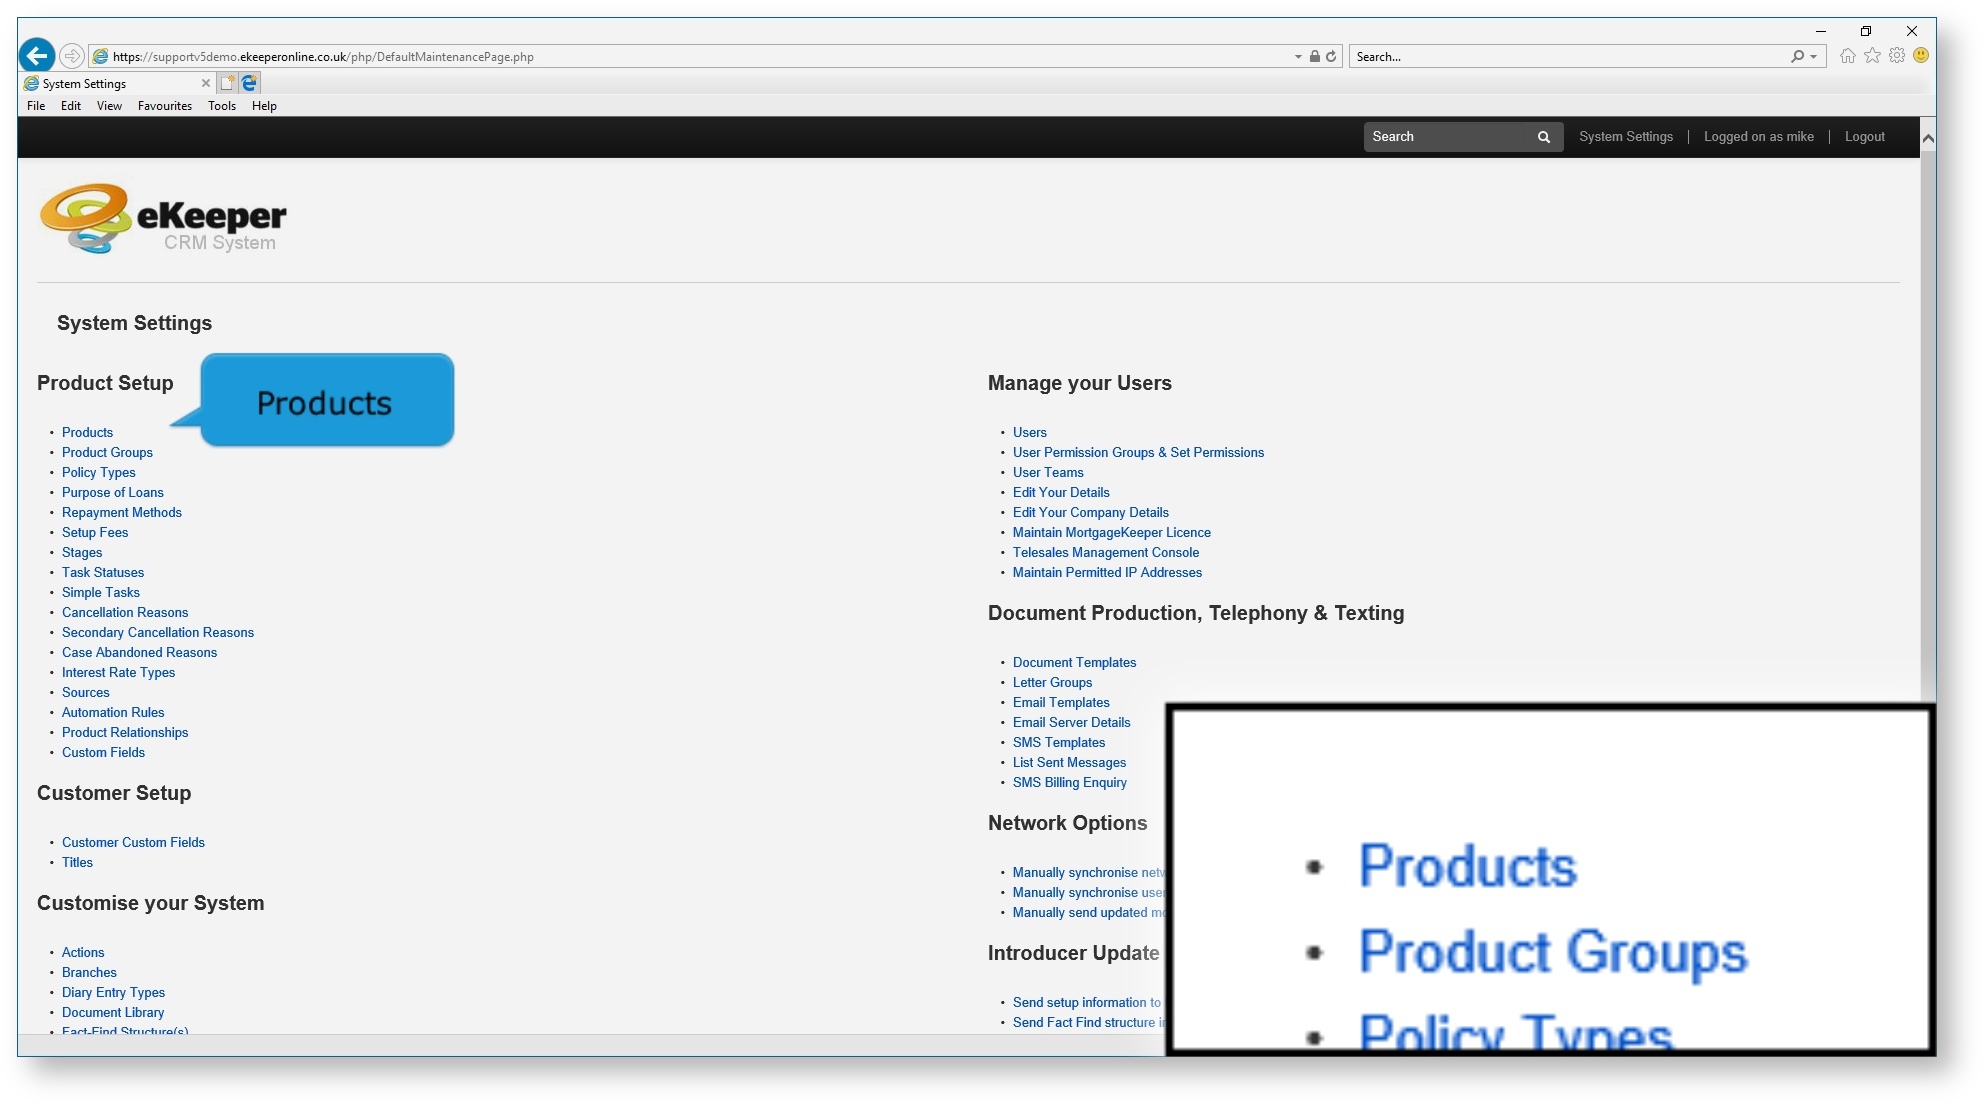
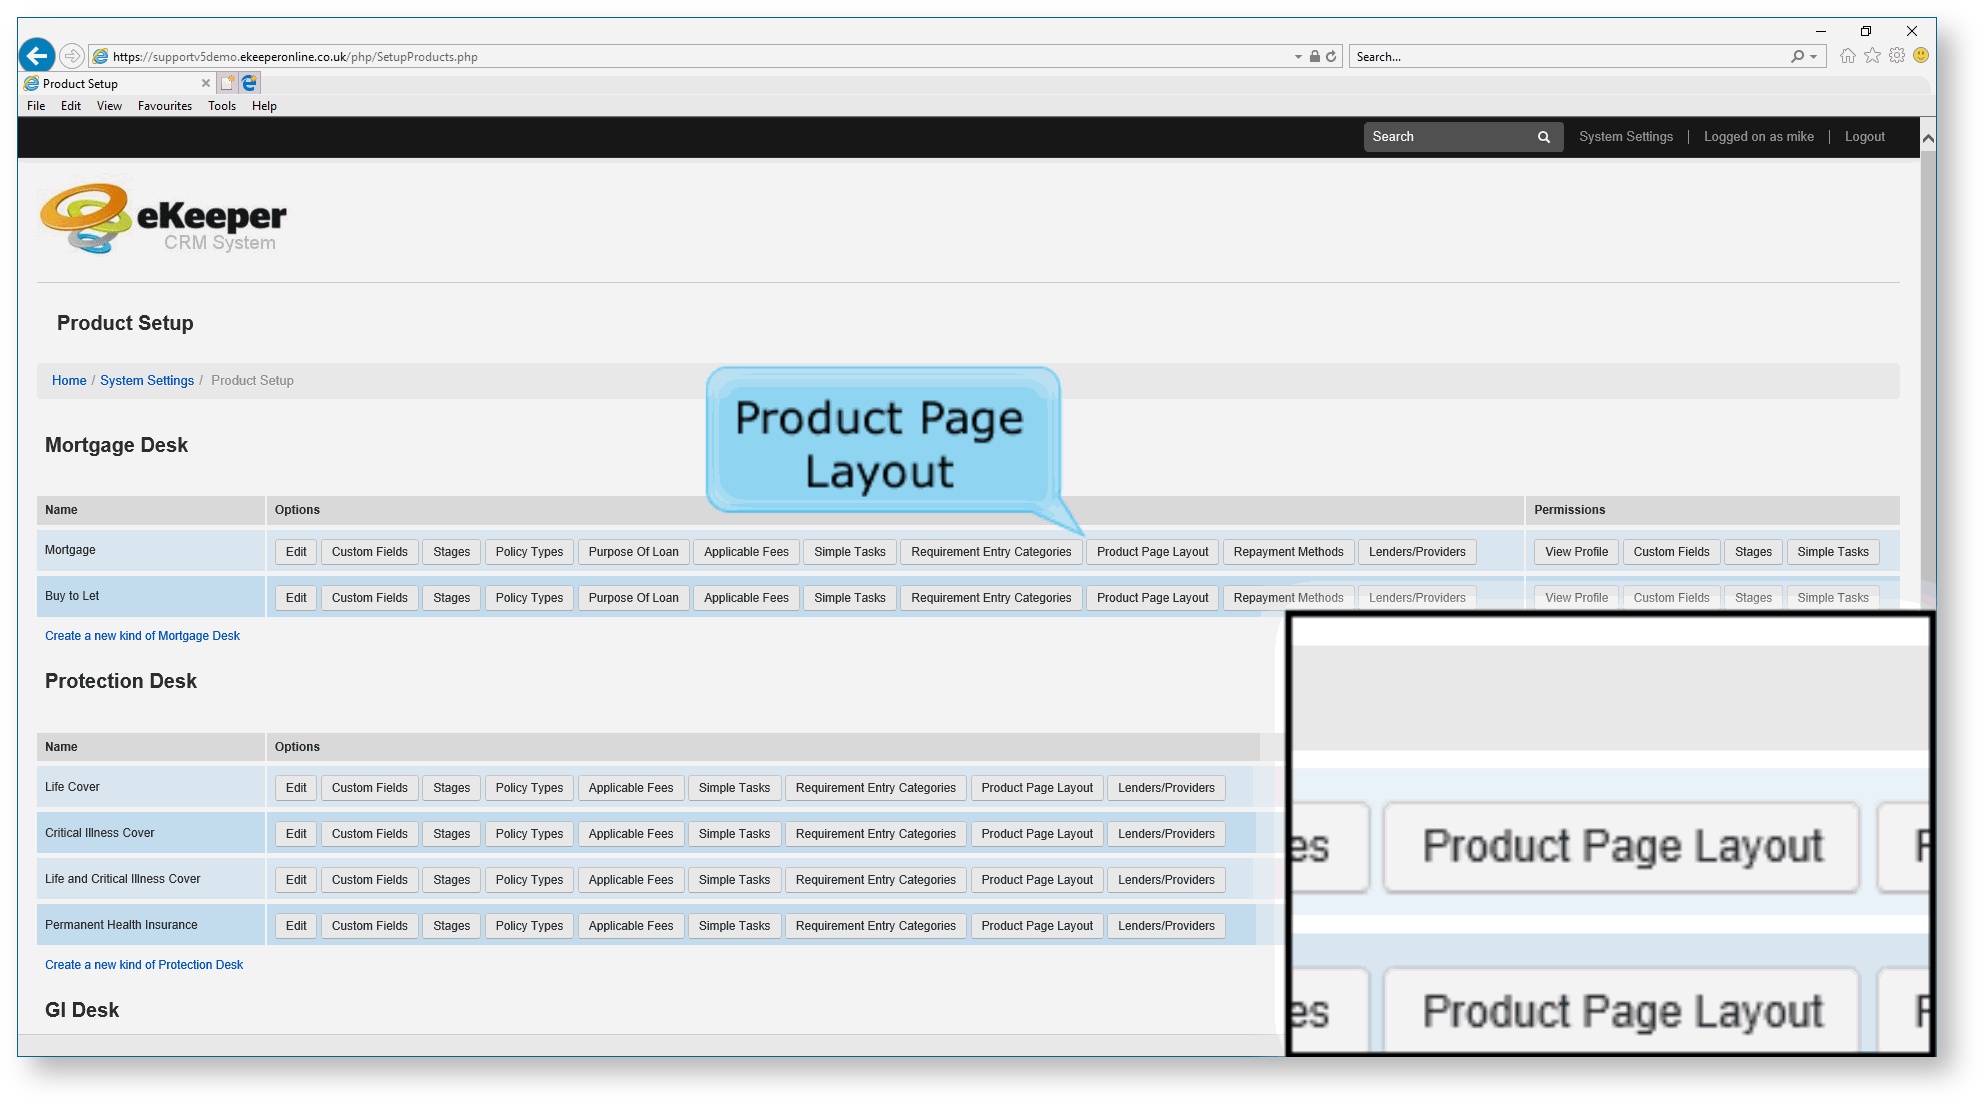
To edit Product Panels, first click on System Settings, then underneath Product Setup, click Products. The Products page will list all your products and give you a variety of options to customise how they function in eKeeper. The page we want to customise the layout is Product Page Layout.
Can't find the setting you need?
Note that your System Settings page may appear differently depending on what settings you are given permission to view. If you cannot find the setting you are searching for, speak with your eKeeper Administrator who will have the capacity to grant you access.
Quick Navigation...
System Settings > Products > Product Page Layout
Step 2 - Managing your Product Panels
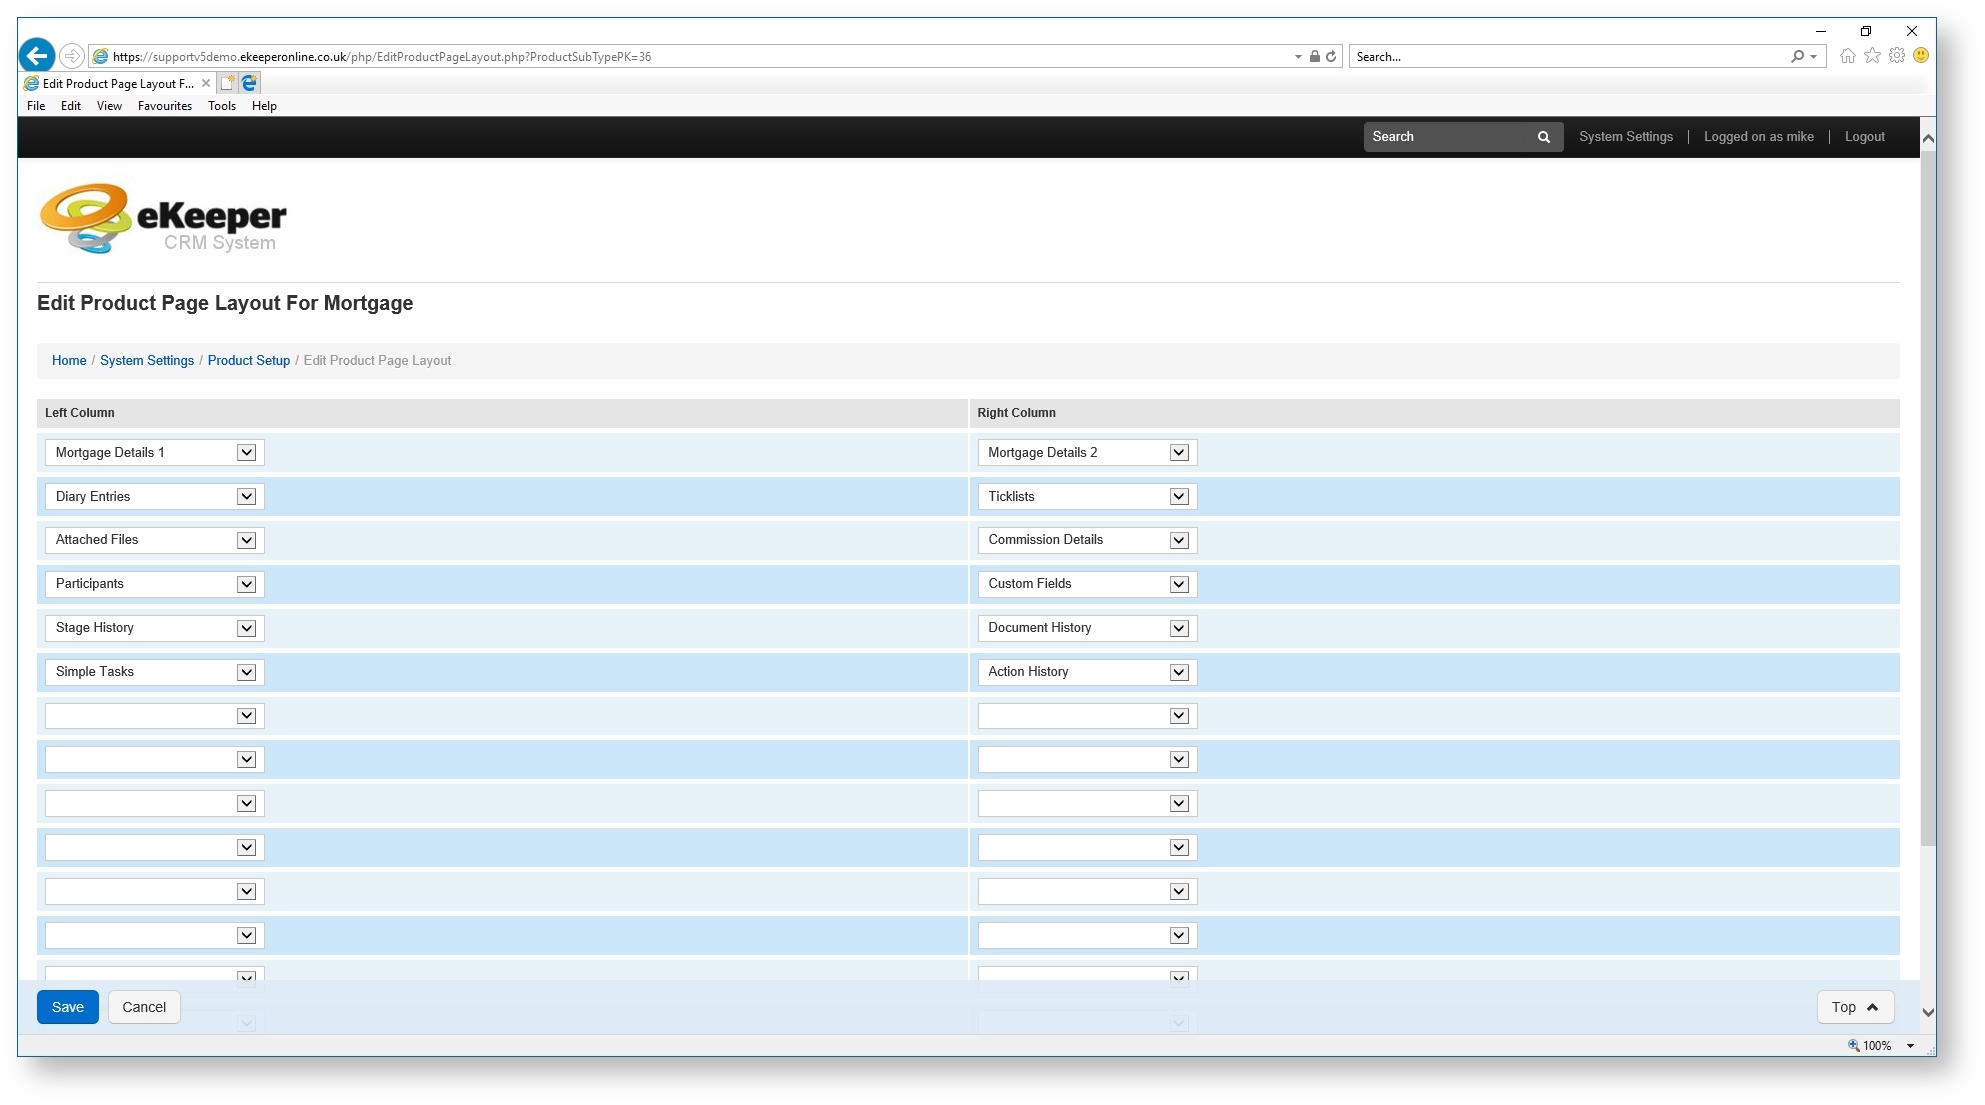
The Edit Product Page Layout page is divided into two columns and multiple rows, the same way that a case displays the panels.
-Edit Product Page Layout
Each cell represents a panel, and clicking on the drop-down menu will give you a list of the different types of panel. e.g. Mortgage Details and Stage History.
Select the panels you wish to appear and the order that they are displayed. Click Save to save the changes you have made, or cancel to undo any changes.
Want a panel to span the full width of the page?
-Specify the panel on the left column
-Select 'Left Panel Spans Whole Width' on the same row within the right column


