Fact find configuration
- Click 'Configuration' in the top navigation bar.
- Then select 'Fact Find Configuration' on the lower navigation.
Configure your Fact Find with SENRO to suit the needs of your Network and also your Business practices. Choose to create a single Fact Find to cover all scenarios or multiple Fact Finds that are specific to each business type, For example, an Investment Fact Find.
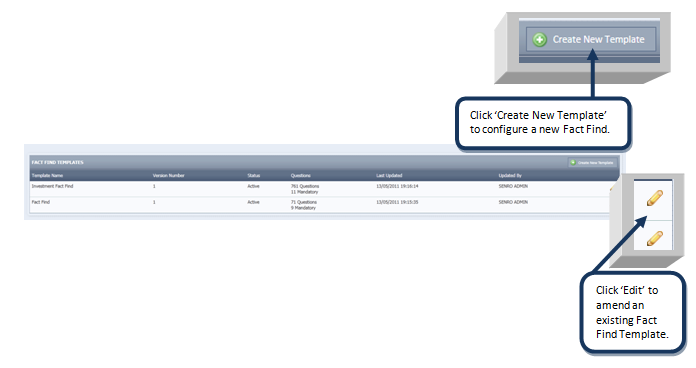
To prompt the configuration process we have selected a few essential questions from each section to allow you to gather basic information during your client visit. Simple click 'Create New Template' as shown above to configure a basic Fact Find to get you started.
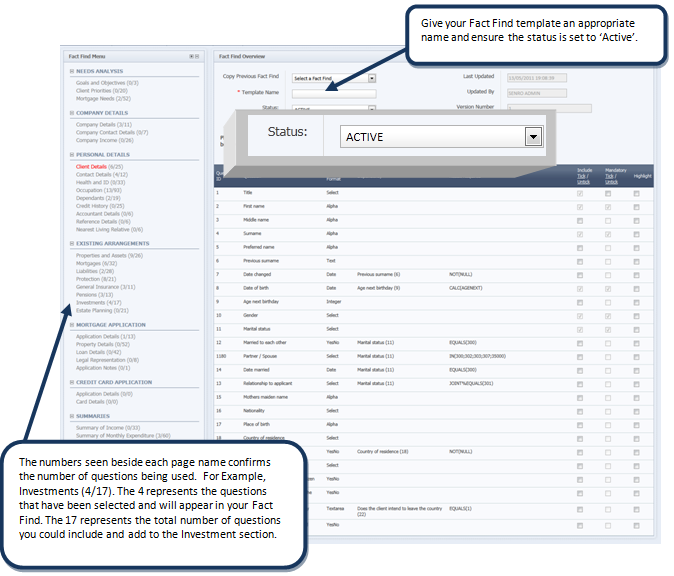
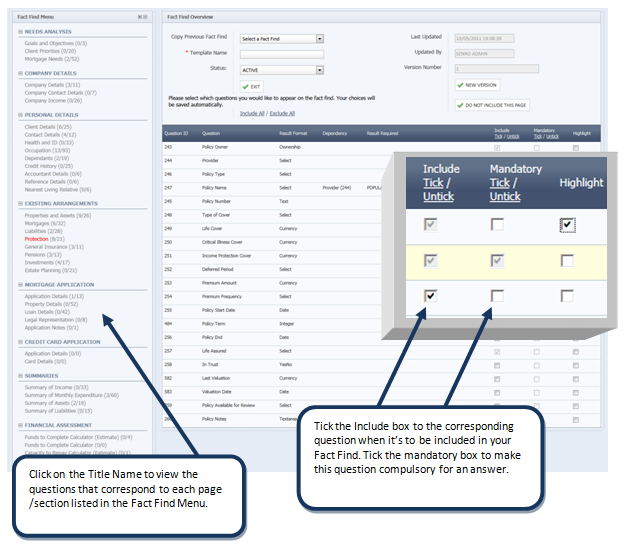
To add questions and navigate through each template, see the Fact Find menu situated in the left hand column of your screen. Click on the page name to view the questions which correspond with that area.
The SENRO Fact Find provides you with the ability to copy previously started Fact Finds. You may have configured a basic Fact Find which more questions are to be added to. To do so click on the dropdown menu and select the Fact Find you wish to copy, a Warning message will appear asking you to confirm the request, click OK to proceed or Cancel to stop this command.
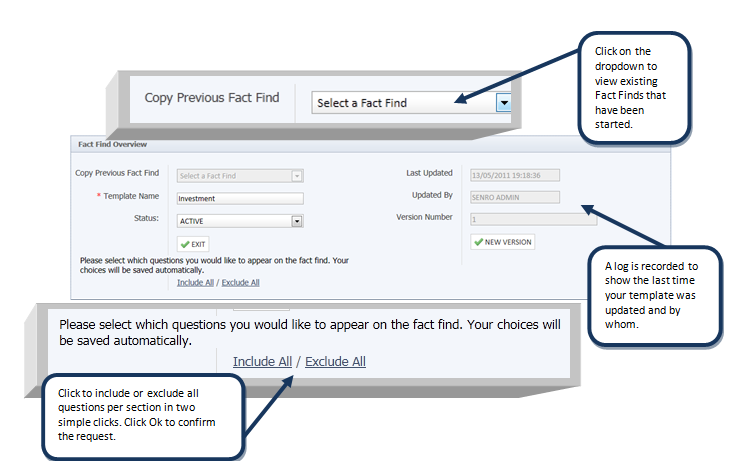
For a smoother selection process, we have provided various options to speed up the
configuration.
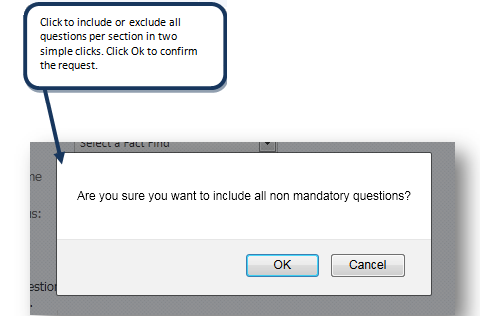
Include All / Exclude All
The 'Include All' / 'Exclude All' option refers to the questions in the entire Fact Find. Simply
click on the hyperlink shown above to include all or exclude all questions in two easy clicks.
The below pop up will appear asking you to confirm the action before finalising your
request.
Tick / Untick
You will see a Tick / Untick hyperlinkavailable within the columns 'Include' and 'Mandatory', this refers to the ticking or unticking of all questions within the current page/section you are viewing.
Note

Include this Page / Do Not Include this Page
This button refers to the greyed outfields found throughout your Fact Find. We have put together a basic Fact Find to get you started but if you do not wish to include these questions you can choose to exclude them by clicking the 'Do Not Include this Page' button or in reverse, adding them back in by clicking 'Include this Page'
Fact Find Logic
Logic has been applied to a number of the questions in Fact Find, this means a relationship exists between some questions and relies on these questions being selected first. For example, ifyou want to include the question referring to the client's "Date of Name Change" you must first select the "Previous Surname" field which corresponds with this question and confirms a previous surname exists. A pop up box will appear when corresponding relationships exist toa question.
You will find 3 columns with a row of tick boxes provided beneath each one;-
- Include = If you wish to Include a question, tick this box located beside the question.
- Mandatory = If you wish to make 1 or more of the included questions mandatory, tick this box. You cannot make a question Mandatory until you have 'Included' it in the Fact Find through the Include column. Note: When filling out your Fact Find with client, mandatory questions will remain outstanding until they are filled in. You cannot 'Complete' a Fact Find where outstanding questions exist.
- Highlight = When filling in your Fact Find, questions will appear in bold when they have been ticked as 'Highlight'
Note
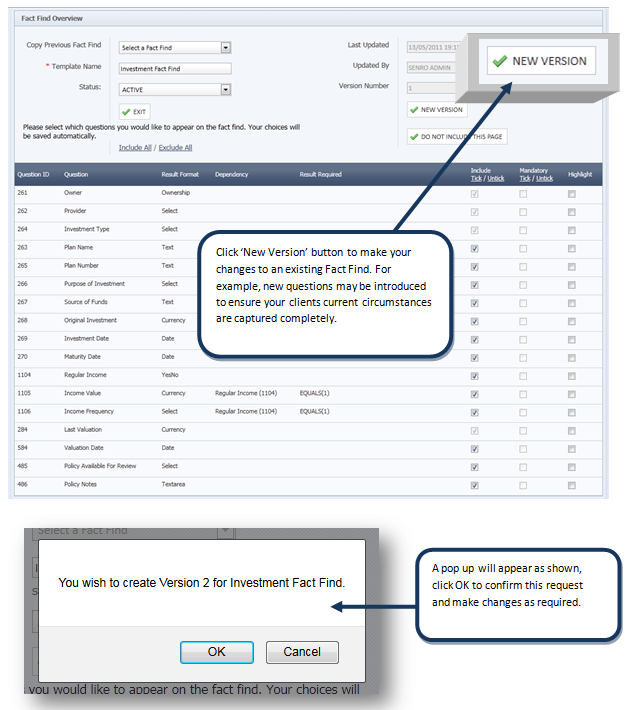
Create a New Version
You may create multiple versions of an existing Fact Find, it may be beneficialto use this feature when processes are updated within your Practice or Network.
Each Fact Find template beginsat Version 1. To update an existingversion click the 'New Version' button tocreate a version and make your changesas appropriate. A record will be stored of any previous versions, although if older versions are no longer to be used, you must update the status to INACTIVE.