Solution Builder
- Michael Ttooulis (Unlicensed)
- Roly Birkwood
Video Guide
eKeeper Solution Builder Credentials Video Guide
-Click the above link for a video guide explaining how to add your Solution Builder credentials to eKeeper CRM
Getting Started with Solution Builder
This guide will show you how to add your Solution Builder credentials to eKeeper CRM, how to Export to Solution Builder and how to Import the quotes.
Important
If you haven't setup your Products to display Solution Builder quotes Click Here

-Solution Builder Integration with eKeeper CRM
How to add your Solution Builder Credentials to eKeeper
- First navigate to Home Page > System Settings > Edit Your Details
- Against each user within eKeeper CRM there will be a panel called "Solution Builder Setup".
- This panel is used to store the log-in credentials for your Solution Builder account. When the Solution Builder dropdown is set to "No" then all Solution Builder functionality is switched off for that user. This means that they cannot see; the quotes tab, the product panel, or the export button.
- When set to "Yes" this will allow the user to have access to the mentioned functionality. Apart for setting the dropdown option to "Yes", the log-in credentials will need to be placed within the "Username" and "Password" fields. This will then allow the user to access Solution Builder and save quotes back into eKeeper CRM.
For the Solution Builder integration to work you will need valid login credentials for a Solution Builder account.
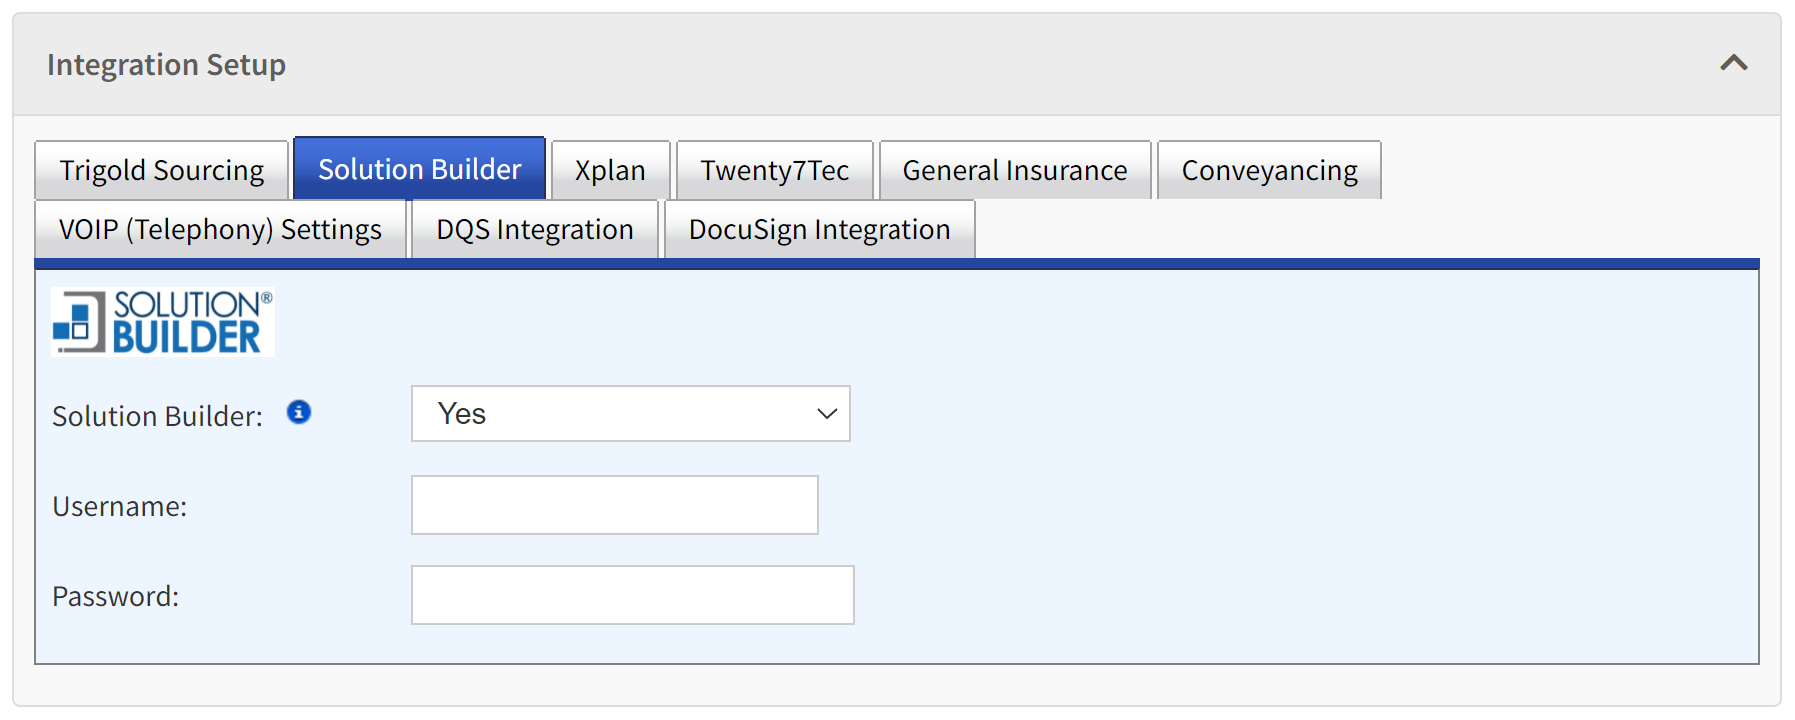
-Solution Builder Setup Panel within Edit Your Details
How to Export to Solution Builder & Import to eKeeper
- On the footer bar of every case you will find a button labelled Export to Solution Builder
- Clicking the button will open up the Solution Builder integration and you will land on the benefit selection screen
- For more information on how to use Solution Builder please reach out to the iPipeline team. The main points to remember when using the system is:
- To add a benefit click Add against a benefit type
- Enter the necessary details and scroll to the bottom of the page and click Save Benefit
- Whether you have multiple benefits or one, click the Quote Now button on the right to load the quotes
- Solution Builder will provide a number of policy solutions, click the Flag icon to add them to your Folder
- Click the Folder icon to view a summary of the flagged policies. If you are happy with them and are ready to bring them into eKeeper, click the Save for Later button
To Import the quotes to eKeeper CRM click the Import to Ekeeper button on the bottom right of the window.
You will be unable to import the quotes to eKeeper CRM without following the above steps. Key to remember Quote Now > Flag > Folder > Save for Later > Import to eKeeper
Now that you have imported the quotes to eKeeper, it is time to save them against a product on the case. Click the Save Quote button and select which product you wish to attach the quote/s to.
If you haven't setup your Products to display Solution Builder quotes Click Here
- Attach the quote to an existing product on the case, or select the option to Create New Product on this Case. Click Continue and select the product.
- Once you have attached all the quotes, click Finish
It can take some time to import the quotes to eKeeper CRM, especially on slower internet speeds. Do not close the window before giving the system enough time to download the quotes.
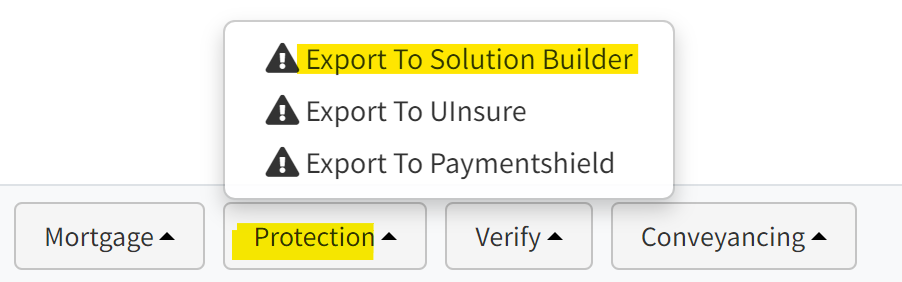
-Export To Solution Builder Button on the case footer bar
-Solution Builder Benefit Selection Screen
Video Guide
How to Export to Solution Builder & Import to eKeeper
-Click the above link for a video guide explaining how to Export to Solution Builder and Import to eKeeper CRM
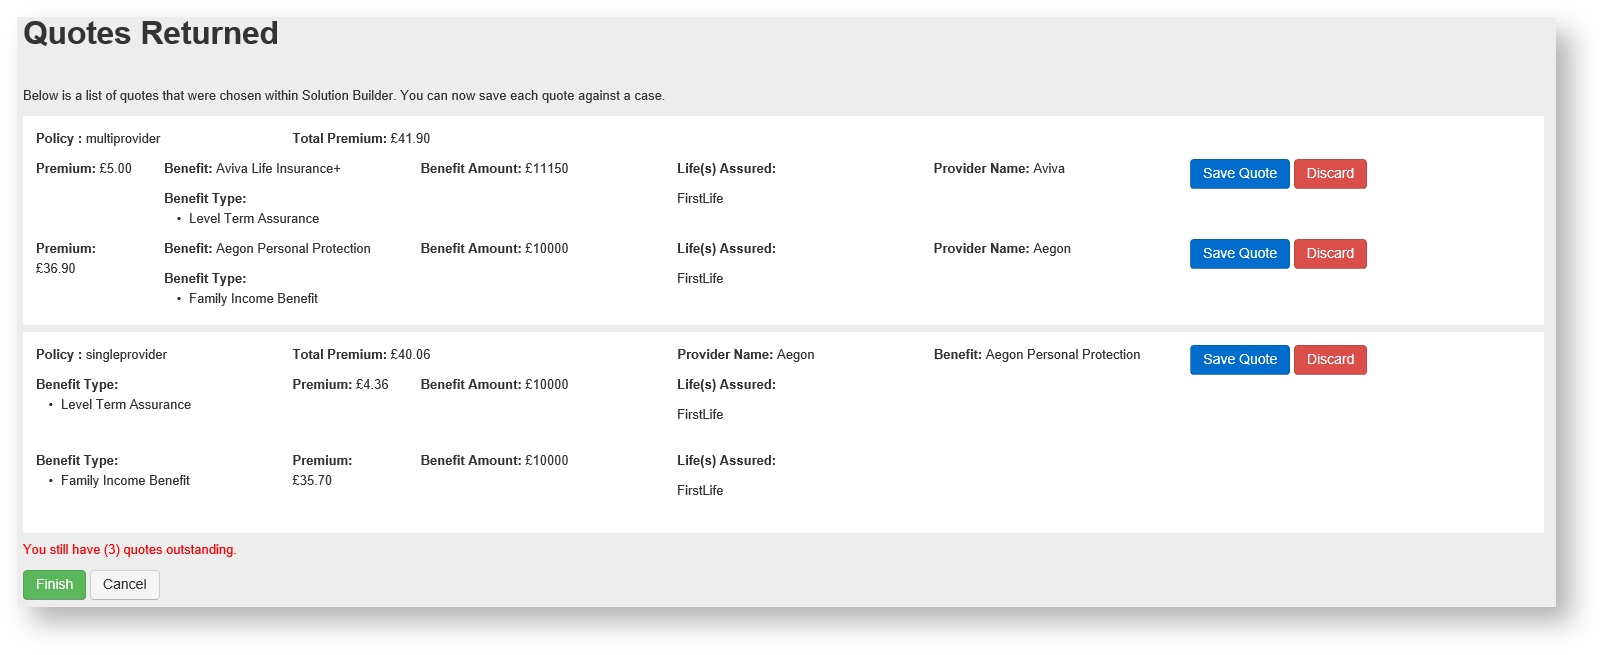
-Quotes Imported to eKeeper, ready to be assigned to Products
Managing your Quotes
- After following the above steps you will see a summary of the imported quotes and which products they are attached to. This is the Quotes Tab and can be reached any time by clicking on the Quote(s) tab on the case. Located next to the Summary and Timeline Button.
- The two actions you can perform on this screen are as follows:
- View: View further details of the quote and this is where you can view the Illustration and Comparison Report
- Proceed: Click proceed against a quote you wish to apply for. This will then prompt if you wish to go to the providers website, where you can enter your login details and continue with the application.
Once the Proceed button is clicked, it will change to 'Apply'. You may have imported multiple quotes per the product, so clicking Proceed signifies which quote should be the 'proceeding' quote. Clicking Apply will also take you to the providers website.
- On the life product, the quote is shown on a Policy Details panel.
- You can View and Apply from here and also see what other quotes are against the application.
- You have now successfully imported a quote into the eKeeper CRM, you can now progress with the application as you see fit. Set the status to applied, add notes etc.
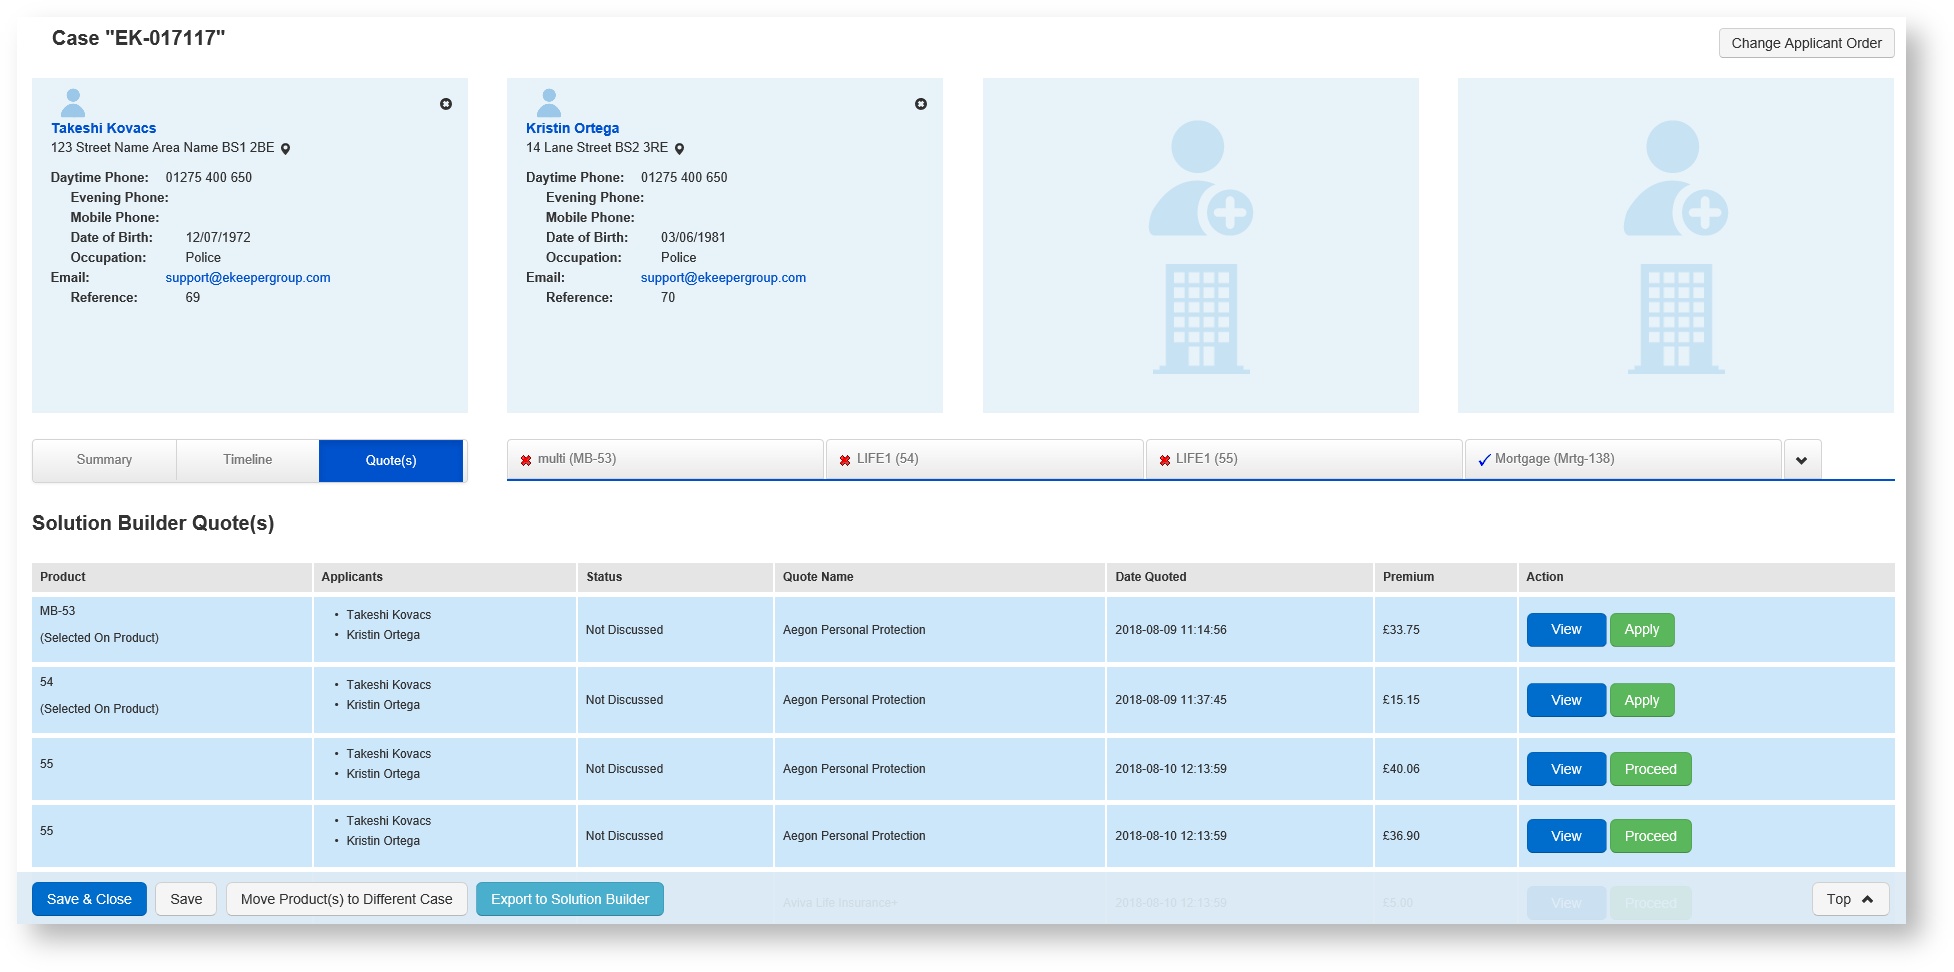
-Quote Summary Tab
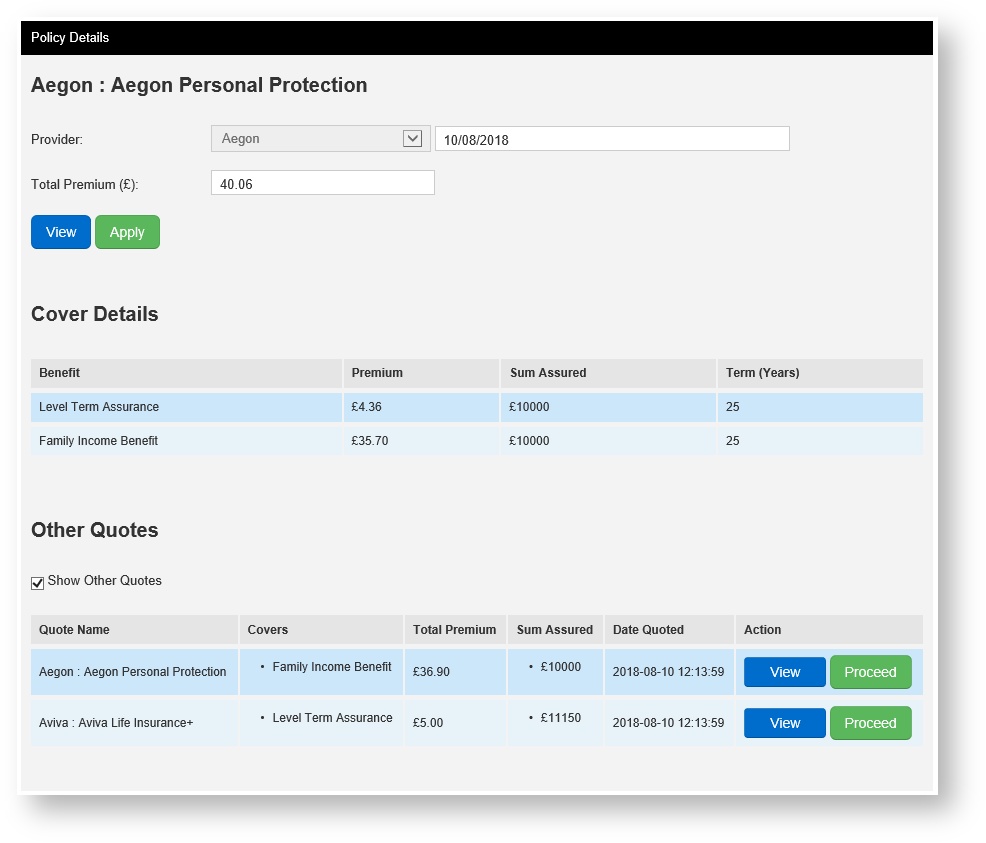
-Policy Details panel on a product application